Maintaining Your Cedar Fence: Tips and Tricks
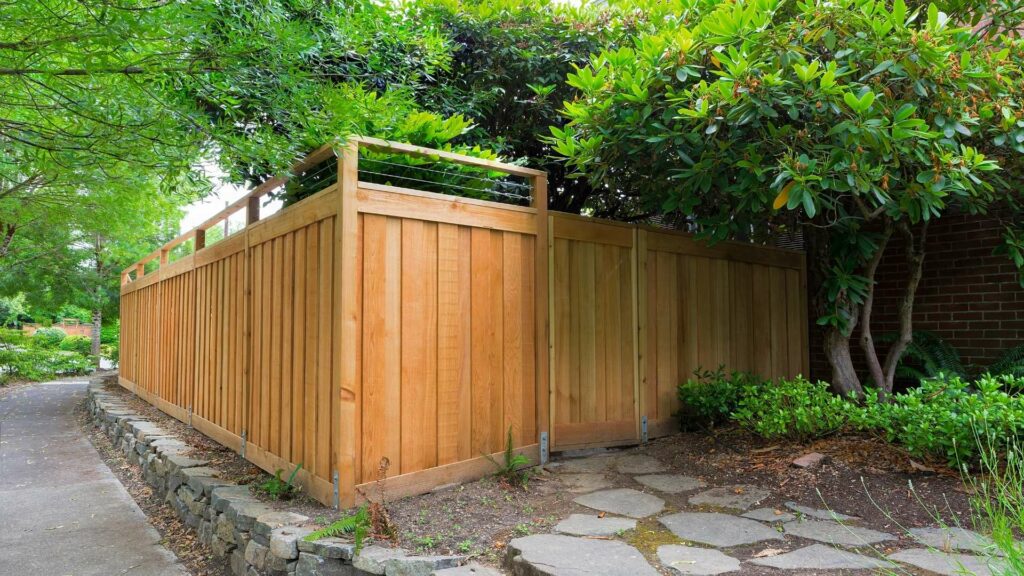
Cedar fences add beauty and character to your property and are popular for homeowners looking for security enhancement. However, like any other wooden fence, cedar can require occasional maintenance to keep it in good condition. In this blog post, we’ll discuss some of the basics of cedar fence maintenance and give tips on keeping your fence looking its best.
How to Prevent Rot and Decay in Your Cedar Fence
Cedar fences are popular for their natural beauty and durability, but they are not completely immune to the effects of the elements. Over time, even the most well-constructed cedar fences can begin showing signs of rot and decay, compromising their structural integrity and causing costly damage. However, with proper maintenance and some preventive measures, you can help extend your cedar fence’s life and keep it looking great for years to come.
- Not all cedar is created equal. When selecting cedar for your fence, choose a variety naturally resistant to rot and decay, such as western red cedar or northern white cedar.
- Water is the primary cause of rot and decay in wood. To prevent moisture from penetrating your cedar fence, ensure that your gutters and downspouts are working properly and that water is not pooling around the base of your fence.
- Applying a sealant or stain to your cedar fence can help to protect it from the elements and prevent moisture from penetrating the wood. Be sure to use a product specifically designed for cedar use.
- Trees, bushes, and other vegetation can trap moisture against your fence and promote rot and decay. Trim back any vegetation growing too close to your fence to prevent this from happening.
- Even a small crack or split in your fence can let moisture seep in and cause rot and decay. Inspect your fence regularly and address any damage promptly by sanding the affected area and applying a wood filler or epoxy to seal the crack.
Trimming Trees and Bushes Near Your Cedar Fence: Tips for Preventing Damage
Trimming trees and bushes near your cedar fence is important to maintaining its integrity and beauty. Overgrown vegetation can cause damage to your fence by scratching the surface, weighing down on it, and potentially causing structural damage. Here are some tips for preventing damage when trimming trees and bushes near your cedar fence:
- Use the right tools for the job to make the process easier and safer. Use pruning shears, hedge trimmers, or a saw to trim branches growing too close to your fence.
- Before you start trimming, identify any potential hazards that could cause damage to your fence, such as power lines or uneven ground.
- Plan your cuts carefully to avoid causing unnecessary damage to your fence. Cut branches back to the trunk or a lateral branch at least 1/3 the size of the branch being removed.
- Regular trimming of trees and bushes near your fence can help prevent branches from becoming too large and causing damage.
- Dead wood can be particularly hazardous to your fence, as it is more likely to break and fall. Remove any dead wood from trees and bushes near your fence.
- If you are unsure how to trim trees and bushes near your fence or are uncomfortable with the task, hire a professional to do the job for you.
Repairing Your Cedar Fence: Common Issues and Solutions
Cedar fencing offers many benefits for your home but can be costly to maintain. In particular, cedar can become damaged from weather and wear over time, making it necessary to repair the fence. Whether you’re working with pressure-treated lumber or Western red cedar fence panels, you can follow a few tips and tricks to keep your cedar fence looking its best and lasting longer. Here are some common issues you may encounter with your cedar fence, as well as solutions for repairing them:
- Warping: Cedar fences are susceptible to warping due to exposure to the elements. To repair warped boards, try soaking the affected area with water and then laying them flat to dry. Once they have dried, re-nail or re-screw them into place.
- Splitting: Splitting can occur when cedar dries out and contracts. To repair split boards, use wood glue to join the split ends, and then clamp the board until the glue dries. Once the glue has dried, sand the area to smooth out rough spots.
- Rotting: Rotting is a common problem for cedar fences, especially in areas with high humidity or frequent rainfall. To repair rotting boards, remove any damaged wood and replace it with a new piece of cedar. When replacing cedar panels due to wear and tear, consider purchasing pre-made panels rather than building the fence yourself. These panels are easy to install and offer a more aesthetically pleasing look than DIY projects. Use wood filler to fill gaps, then sand the area smoothly.
- Loose or broken posts: Over time, fence posts can become loose or broken. Pack the hole with gravel to repair loose posts, and then insert the post back into the hole. Use a level to ensure the post is straight, and then fill the hole with concrete. If a post is broken, remove the damaged portion and replace it with a new one.
- Stains or discoloration: Stains or discoloration can occur due to exposure to the sun or other environmental factors. To repair stains or discoloration, try sanding the affected area and applying a new coat of stain or sealer.
You can extend the lifespan of your cedar fence by using corrosion-resistant fasteners on components in contact with the ground, such as screw heads and anchors, to prevent corrosion from occurring. This includes using galvanized or stainless steel fasteners over traditional zinc ones. Inspect your cedar fence regularly for signs of damage and repair them promptly. Finally, if you hire a professional, ensure they use quality lumber and avoid water traps or troughs in panel designs that can lead to damage.
Staining Your Cedar Fence: Dos and Don'ts for a Professional Look
If you want to give your cedar fence a professional look, there are a few tips and tricks to do the job effectively.
Start by choosing the right wood stain color and finish for a consistent and durable finish. Natural cedar can be stained with any of the popular wood stain options, but select stains formulated for cedar wood. When it comes to oil-based stains, natural cedar tends to shine brighter when oil-based stains are applied.
Once you have chosen the stain, take extra care during the application process to ensure an even coat across the fence. Start with a clean and dry fence, then apply the stain using a brush or applicator. Work in small sections, and avoid overlapping or leaving drips. When finished, use a clean rag or sponge to remove any residue. Also, consider using an oil-based stain for added protection and durability.
To keep your cedar fence looking its best, don’t wait too long between coats of Stain and protect it from fading with a fresh coat of Stain every few years as needed.
Cedar Fence Maintenance for All Seasons: Year-Round Tips for Longevity
Spring
Spring is a great time to inspect your fence for any damage that may have occurred during the winter months. Look for loose boards, rotting wood, or other issues that must be addressed. Use a pressure washer or a mixture of soap and water to clean your fence thoroughly. This will help remove any dirt, grime, or mildew accumulated over the winter months. Once your fence is clean and dry, apply a sealer to help protect it from the elements. This will help prevent rotting, splitting, and other issues.
Summer
Trim any plants or shrubs growing too close to your fence. This will help prevent damage to the fence and keep it looking neat. Watch for pests, such as termites that can damage your fence. If you notice any signs of pest activity, address the issue promptly. Check your gates and hardware to make sure they are functioning properly. Tighten any loose screws or bolts, and lubricate any hinges or latches that may be sticking.
Fall
Clear any fallen leaves or debris from around your fence. This will help prevent moisture buildup and keep your fence dry. Apply a fresh coat of stain to your fence to help protect it from the cold weather and moisture. Inspect your fence for any damage, and make any necessary repairs before winter weather sets in.
Winter
Clear snow and ice from around your fence to prevent damage from heavy buildup. Keep an eye out for any damage that may occur during winter, such as splitting or warping. Use a tarp or protective covering to shield your fence from the elements, if necessary.
Conclusion
Cedar fencing is an excellent choice for your home because of its longevity, durability, and low maintenance. Cedar fencing is resistant to decay and insects and can last for decades. In addition to that, cedar fencing is aesthetically pleasing and can help protect your yard from unwanted pests and animals.
At Pivot Cedar Fencing, they offer services for cedar fence installation, and with over ten years of experience in Maple Ridge, BC, they ensure that you get a durable and well-built wood fence that stands the test of time. Contact Pivot Cedar Fencing to get started on your cedar fence project today!
The post Maintaining Your Cedar Fence: Tips and Tricks appeared first on Pivot Cedar Fencing of Maple Ridge.
from Pivot Cedar Fencing of Maple Ridge https://www.pivotcedarfencing.ca/maintaining-your-cedar-fence-tips-and-tricks/?utm_source=rss&utm_medium=rss&utm_campaign=maintaining-your-cedar-fence-tips-and-tricks
via IFTTT


No comments:
Post a Comment